Sunday, October 31, 2010

Paleo Party!

Every Monday night, Curt and I get together with some friends from our church, New Life. We always take turns bringing dinner for the whole group. It's just easier for one couple to volunteer per week than to coordinate to have everyone bring one dish every week. This week, it was our turn!


Since Curt and I are trying to eat Paleo, I thought this would be a good chance to show people that, despite what some people think, eating Paleo isn't hard. You can really eat plenty of yummy food that is actually good for you! I wasn't sure what I could make that would be cost effective for 20 people, so I got creative. Chicken was a good price, so I combined a few recipes, took out some bad ingredients, and added a few extra ingredients and here we have
 
Pretty Much Paleo Chicken!

Please remember that I cooked food for 20 people, so this recipe is HUGE! Just cut the recipe into fourths and you should have enough for a nice dinner and a good number of leftovers!


* 15 lbs of chicken drumsticks
* 2 quarts of beef broth
* 2 large spanish onions
* 2 shallots
* 1 head of garlic
* 4 carrots, thickly chopped
* 1 tbs salt
* 1 tbs pepper
* 1 tbs garlic powder


I had bought a TON of chicken because I never want to run out of food and have people still be hungry. So this is why I ended up cooking flipping 16 lbs of chicken! The scary thing was that I actually bought 3 of those huge packages of chicken, but after going through the first 2, I thought that was enough. Once I had bought the chicken, I was sure that I'd figure out something to make.


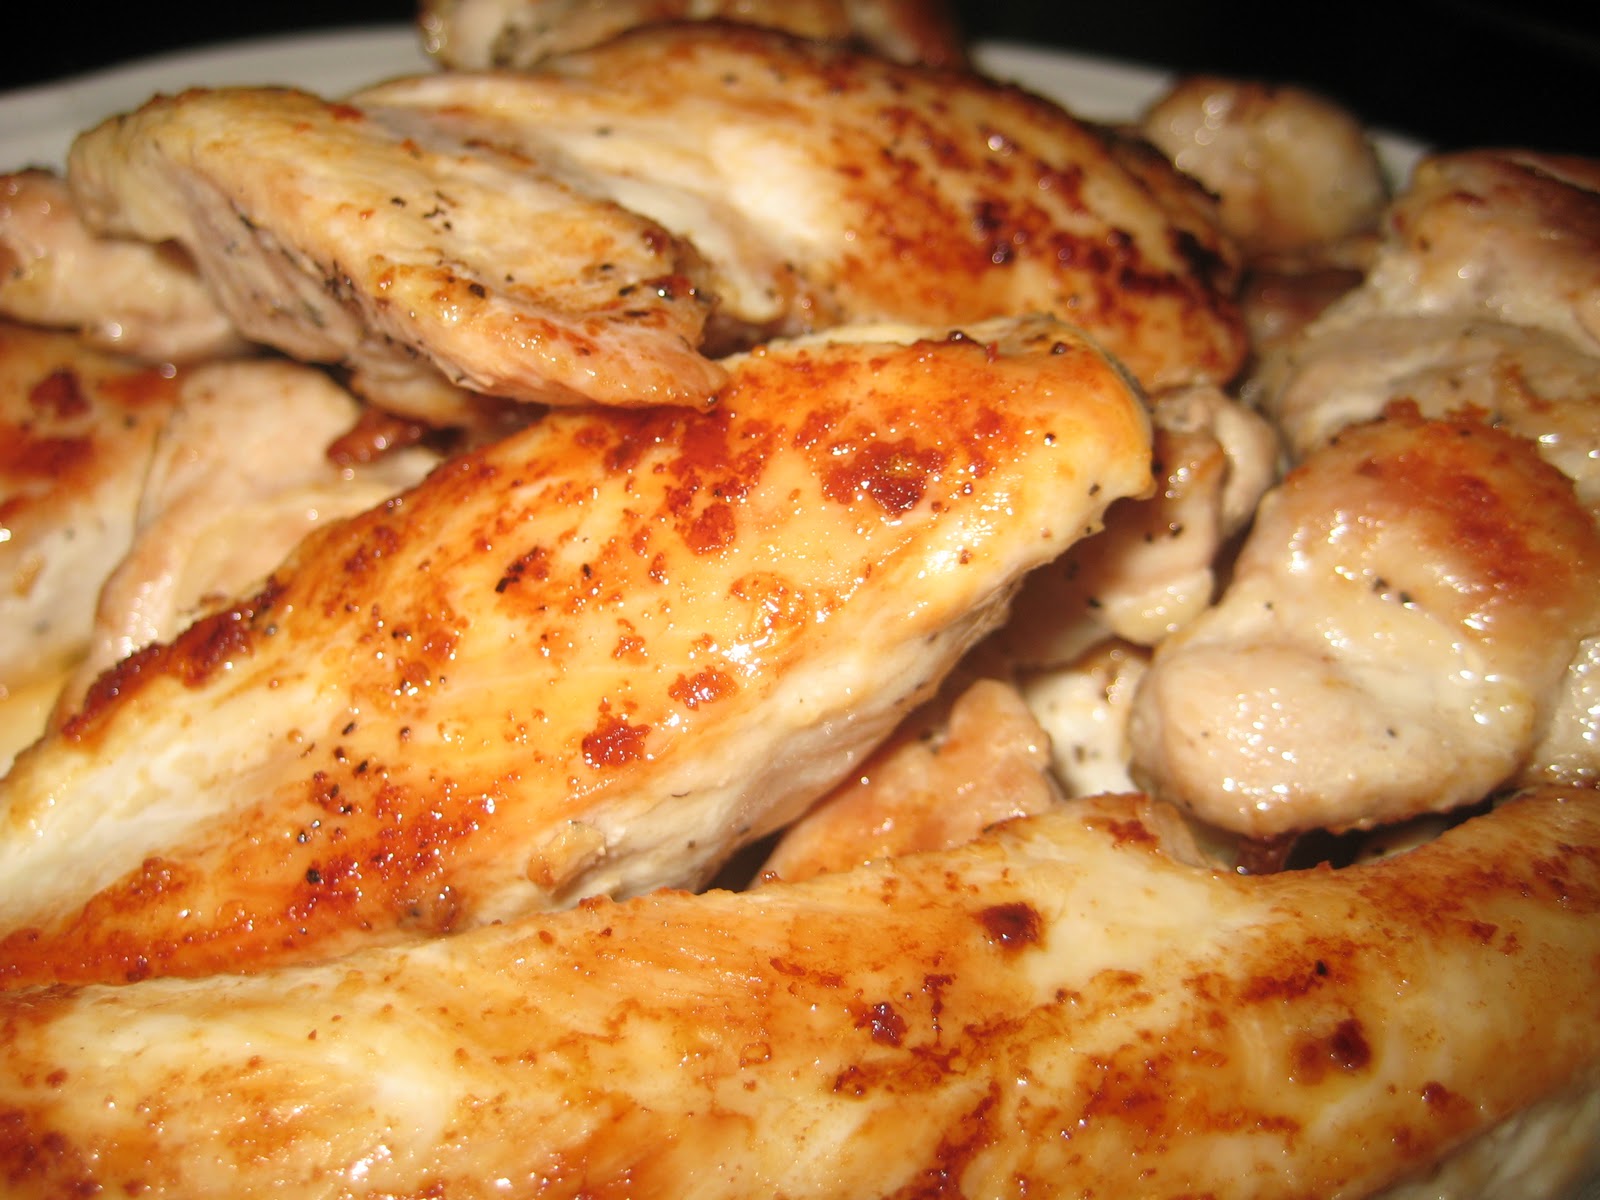
Talk about a lot of chicken!

First, I seasoned the drumsticks with all of the salt, pepper, and garlic powder. I didn't want to be cooking all night, so I took a few pans and worked in batches. Over medium heat, I heated some oil in the pan. Once the oil was hot, I added the chicken and let it get nice and brown. I didn't need to let the chicken cook all the way because I finished cooking it in the oven later. This part took a LONG time, even when using 3 pans at a time, but what else could I expect after buying so much chicken?!


Once the chicken was nice and brown, I set it aside in some casserole dishes. If you have a nice covered pot that can go in the oven, that would be a good thing to use. In lieu of that, I just tightly covered the casserole dishes with some good aluminum foil. I then set to making some sort of sauce to braise the chicken in.


First, I took some sliced onions, minced garlic, chopped carrots, and some minced shallots and tossed them in the same pans I had used to cook the chicken. I also added in some extra oil so that the rest of the ingredients wouldn't burn.


Once everything was sauteed until nice and soft, I added in a few cans of diced tomatoes. Then, using my creative cooking sense, I added in some red wine and let that cook off. I also added in beef broth. I know that this is chicken and using chicken broth would definitely make sense, however, I bought beef broth and the homemade chicken stock I had was a solid block in the freezer. I figured... what the heck, it should be ok!


Once everything was a nice smelling brew, I spooned everything over the chicken and wrapped up the dishes in the foil. I popped everything (all 4 dishes) in the oven at 400 and baked away!


In the meantime, I chopped up a TON of veggies! I chopped onions and chopped mushrooms and chopped cauliflower and chopped three different colors of peppers!


I chopped onions and green peppers


And I chopped red and yellow peppers

And I chopped mushrooms!

And I chopped zucchini!


I had originally planned to roast them. But, unfortunately, my oven looked like this:
 
Sooooo, I decided to throw everything on the grill. I tossed the veggies in some olive oil and also added in some of this super yummy spice blend that Curt's mom gave me. I turned the grill on medium. I didn't want the veggies to fall through the grate, so I improvised. I had bought these aluminum oven liners a while ago, but hadn't used them yet, so I threw one of those on there and it worked pretty well!
Before being thrown on the grill

After the yumminess of the grill


So, here we have everything! Braised chicken drumsticks with roasted veggies! The dish was pretty good... I wouldn't say that it was one of my favorite dishes that I've ever made, however, it was really popular and everyone seemed to like it, even those who were on diets!


Now, I always bring dessert and I didn't have time to figure something out that would be Paleo, so I made this  Butterscotch Apple Cake that I found on a blog that I follow, TheMessieKitchen. Everyone loved it :)


Wednesday, October 20, 2010

Spiced Pork Loin with Sauteed Apples


So I thought that this Paleo thing would be harder than it is.  The only times I even get tempted to eat bad stuff is when I either don't have food prepared for me to eat (having healthy snacks on hand makes life soooo much easier) or when I have a big old basket of yummy bread in front of me (easy enough to avoid).

This month's Cooking Light had a ton of yummy sounding recipes, but this one really stuck out as one I wanted to try, and it fit the Paleo criteria (which really isn't that stringent).  It's Spiced Pork Tenderloin with Sauteed Apples.  I got all geared up to make it and threw all the ingredients in my cart when, unfortunately, Whole Foods didn't have any pork tenderloin.... I just decided that I HAD to have the meal, so I got pork loin instead... close enough, right? 

Of course, I made a few changes to the recipe, but overall, it's pretty similar.  Here's my take!

Spiced & Roasted Pork Loin
with Sauteed Apples


* 1/2 teaspoon salt
* 1/4 teaspoon ground coriander
* 1/4 teaspoon freshly ground black pepper
* 1/8 teaspoon ground cinnamon
* 1/8 teaspoon ground nutmeg
* 1 pound pork loin
* 2 tablespoons butter
* 2 cups thinly sliced Gala apples
* 1/3 cup thinly sliced shallots
* 1/8 teaspoon salt
* 1/4 cup apple cider


First, in a small bowl, I mixed the salt, cinnamon, nutmeg, coriander, and pepper.  Then, I rubbed it on all sides of the pork loin.  The original recipe called for the pork tenderloin to be sliced and cooked in a pan. Since I was using a thicker cut of meat, I wanted to roast the pork, so I preheated the oven to 400. 


Next, I heated an oven proof pan up to high heat.  I added in a little bit of oil and plopped the seasoned pork loin on and listened to the sizzle.  When you roast a piece of meat, you want to brown it on all sides.  This sears it and locks in the flavor, so all the juices don't go running out of the cut.  You want them to stay inside and keep the meat tender and flavorful!  This process made my entire kitchen fill with smoke.  I had to disable the fire alarm just to make sure that it didn't go off!  It burned the pan a little, but oh well :)


After the pork was browned on all sides, I wanted to put the loin in the oven to cook.  When you roast something, you want to elevate it so that it's not sitting on the pan.  You want the air to be able to circulate all around the meat.  I didn't have any onions or mini roasting racks, so I found some carrots in the fridge and stuck the pork loin on top of them to roast.  See how crafty and clever I am?!


  While the pork was roasting, I got the rest of the ingredients ready to go.  I sliced up the apples.  The recipe said you should leave the peel on, but I don't particularly like the peel when the apple is soft and the peel isn't.  So leave it on or peel it off, whatever you prefer!  I also chopped up a shallot pretty finely.
 

I roasted the pork loin for about 30 minutes.  It was so small that it didn't really take long to cook.  I just cooked it until the thermometer inserted into the middle reached 135.  Then I pulled it out and placed the meat on a separate plate and covered it with aluminum foil to rest and let the juices redistribute. 

In the pan I roasted the pork in, I added the butter and let it melt.  I also added a little bit of white wine vinegar just to deglaze the pan and get all of those yummy flavors into the sauce.


Once the butter was melted, I added in the minced shallots and let them soften up a bit.  Then I added in the apples.  I wasn't really sure what to expect because I cook apples all the time, but I usually add in sugar.  I didn't really know how "savory" apples would taste.


I cooked the apples until they were softened, but not to the point that they were mushy.  Then I added in some of the cider.  I found organic apple cider which only contained apples.  There was no sugar or spices or any other junk in there, so it tasted really good!  I cooked the mixture until it had reduced a tiny little bit, then plated everything!


Please notice the use of my pretty fall plate for the season!  :)  So, here we have the pork loin with sauteed apples.  I served it with an artichoke that my mom sent over (more on artichokes to come!.  I also baked a sweet potato to split with the hubby.


Here's my delicious Paleo Dinner... who says that diets have to be painful?  Seriously, this dinner was delicious!  I ate until I was full and didn't have that gross... "Ugh, I ate too much" feeling you get when you eat a ton of crappy food! 

The pork was nice and tender and the spicy crust was really good too.  The sauteed apples and the sauce went REALLY well with the whole meal and it was great to dip the pieces of the pork in the sauce from the apples.  The artichoke was yummy and the sweet potato was great to have too.  It was the perfect fall dinner and it made the whole house smell like warm fall spices!


Sunday, October 17, 2010

The Cookin Cutie Goes Paleo?

So, has anyone ever heard of the Paleo Diet?  Well, if not, you should check it out.  It's not so much of a diet to lose weight as it is a way to eat food that is actually good for your body (weight loss, clear skin, more energy, and more muscle tone are just some of the benefits!).  Anyway, I don't want to get on a soapbox and explain all the details here.  If you are interested, leave a comment and I'd be happy to talk more about it! 

Anyway, in an attempt to live a healthier lifestyle, I'm attempting to eat foods that are actually good for me!  I found this recipe in some magazine a while ago. I ripped it out, though, so I really don't remember where it came from, but it sounded yummy, and it fit with the Paleo thing!
I've heard of a lot of people cooking chicken under a brick, and I'm not really sure what's so cool about it, but I thought I'd give this a try!


* 1 cup fresh orange juice
* 1/3 cup fresh lime juice (about 3 limes)
* 1/4 cup fresh lemon juice (about 1 1/2 lemons)
* 2 tbs olive oil
* 3 tsp salt, divided
* 2 tsp finely chopped rosemary
* 1 1/2 tsp dried oregano
* 1 clove garlic, chopped
* 1 whole chicken ( about 3 3/4 lbs) - butterflied
* 1 tsp paprika
* 1 tsp black pepper
* 1 1/2 oranges
* 2 foil wrapped bricks or something heavy to press the chicken down


I started this on Saturday night, but actually grilled it today.  I like giving meat a long time to really soak up all of the marinade juices and flavors!

Basically, I mixed up the rosemary, juices, olive oil, oregano, and 1 tsp of the salt in a glass baking dish.  Easy enough, right?


I bought a whole chicken from Whole Foods, but I had to butterfly or spatchcock the chicken myself.  That's always a fun experience haha. 

Basically, you flip the chicken upside down so the backbone is facing up.... then, you snip out the backbone.  It's kinda weird, because you need kitchen shears and you are literally cutting through the bones, but you need to just forget that the carcass you are mutilating was a living, breathing animal :)  Anyway, make sure you keep the backbone, because you can use it to make yummy chicken stock.  Home made is always better than store bought!


After the chicken has been violated and the marinade has been mixed, I just threw the chicken in the marinade and covered it with some plastic wrap to soak overnight.  The recipe said you only have to marinate it for 2 hours, but I wanted to keep it longer.


About an hour before I was ready to grill the chicken, I took it out of the fridge to come to room temperature.  When you grill or cook any meat, you want it to be room temperature.  If the inside is cold, then the chicken won't cook evenly, which, especially when working with chicken, is no bueno.


While I was waiting for the chicken to come to room temperature, I mixed up the paprika, 2 tsp salt, and the pepper in a small bowl.  Then, I took the mixture and rubbed it all over the outside of the chicken.  I also sliced up the orange. 


Once the orange is sliced up, you loosen the skin away from the chicken and you slide the orange into the space between the skin and meat.  Now, you've already butchered the chicken, so adding the orange beneath the skin isn't that bad in comparison!


So, now you have a mutilated chicken who has been rubbed in a red spice mixture and had oranges shoved in every place possible.  It's time to heat up the grill! 


I heated up the grill to medium heat (if it's too high, you will burn the outside and leave the inside raw!).  I took the chicken and placed it breast side down on the grill.  I immediately heard the sizzle of the chicken which means yumminess is to come!


Now, you are supposed to use a brick, hence the name chicken under a brick.  However, I don't have a brick.  In the past, I used my tea kettle filled with water to weigh down the chicken.  Unfortunately, my tea kettle is gone. (long story... there will be a post about it!)  So, I used my cast iron grill pan - which weighs a lot- to weigh the thing down. 


So here's the chicken hiding under the foil and the grill pan!  It's sizzling the whole time.


After about 12 minutes, I  lifted up the grill pan and flipped the chick over to cook on the other side.

 The skin was all charred and crispy.  The picture in the article I ripped out of the magazine has skin that is black and crispy like this, but, surprise, surprise, it looks yummier in the magazine.  Anyway, I flipped the bird ( haha flipped the bird!) over and let the other side cook for about 5 minutes. 


Here's the delicious little chicken all cooked and ready to be eaten! I grilled up some asparagus and some mushrooms too. 


So here it is, a perfectly Paleo (I think) meal.  I had some chicken and grilled mushrooms and asparagus.  It was really yummy!  I liked how the chicken turned out. It wasn't the best chicken recipe that I've ever had, but it was pretty flavorful and it filled me up, which is, afterall, the purpose of a yummy meal. 


I'm still experimenting with this whole paleo thing, but look for more yummy recipes to come.  Does this mean that I won't ever bake cookies again?  What about pasta? Not necessarily... However, if I can create delicious meals that are good for me and taste amazing too, then why wouldn't I?

Monday, October 11, 2010

Tuscan Style Chicken

So almost anyone who cooks, or at least has a TV, knows of Rachel Ray.  I watch her show every once in a while, but rarely do I make the meals she makes.  Last weekend, though, as I was reading through her cookbook, I found 2 recipes I thought sounded so good that I had to try immediately!  Last Sunday, I made Zuppa Osso Bucco.  This Sunday, I made Tuscan Style Chicken with Rosemary!

Tuscan Style Chicken with Rosemary


* 2 lbs boneless, skinless chicken thighs
* 1 1/2 lbs chicken tenderloins
* 3 tbs extra virgin olive oil
* 6 cloves of garlic, crushed
* 2 tbs white wine vinegar
* 2 tbs butter
* 2 shallots, chopped
* 6 sprigs fresh rosemary, finely chopped
* 2 tbs all purpose flour
* 1 cup dry white wine
* 2 cups beef broth


I love love love rosemary!  I never really liked it until I made a rack of lamb with rosemary for Valentine's Day one year.  Since then, I've been hooked!  I saw the rosemary in this recipe and knew I had to try it. 


So to make this dish, I first seasoned the chicken with salt and pepper.  In a large saucepan, I added the olive oil and heated on medium heat.  I added in the crushed garlic and let it start to soften up a bit.  Then, I started adding the chicken to the pan to let it brown. It doesn't matter if the chicken doesn't get cooked all the way through, because you will finish cooking it at the end. I had to work in different batches, because my saucepan isn't all that big (it's on my Christmas/Birthday wish list!).


Typically, I let the chicken get more brown than this, but Curt was really hungry, so I was trying to hurry along the process!  Once all the chicken was browned, I set it all on a separate dish to rest while I prepared the rest of the dish. 

To the pan, I added in the white wine vinegar.  Like I had mentioned in a previous post, this deglazes the pan, so it separates all those yummy little browned bits from the pan, so the flavors can incorporate into the sauce and give it a delicious flavor!  You have to stir the pan a bit and make sure everything has "unstuck" from the pan.  Also, you have to let it "cook off."  Although I'm not 100% sure what this means, I just let it cook until it reduced a bit and it didn't smell like a punch of vinegar to the face when you try to sniff it.


After the vinegar had evaporated a bit, I added in the butter and let it melt a bit.  Next, in went the chopped shallots and rosemary.  Shallots are delicious! They are like a mix between a clove of garlic and onion... and they are a pretty purple color.  The flavor is nice and delicate and absolutely fantastic!  I let the shallots soften and cook down for about 2-3 minutes.


After the shallots had softened a bit, I added in the flour and let it cook a bit.  You have to "cook" the flour which sounds weird, but it's an important step. If you don't cook it, the dish will have that raw flour taste which could make for an interesting sauce.  Next, I added in the wine.  Because the flour is a thickener, the wine started thickening up the sauce.  It was a consistency of almost like a milkshake.  I started to get a bit worried because I didn't want it to burn.   You have to constantly stir the whole thing so that the mixture doesn't get stuck to the bottom of the pan and burn... so stir stir stir!


Next, I added in the beef broth.  This helped to thin out the mixture a bit more so it represented more of a gravy rather than mashed potatoes!  You have to bring the whole mixture to a boil and whisk the whole time so that everything can really combine.

At this point, I started to get nervous.  I tasted the "sauce" and it didn't taste good.  It tasted kinda sour and weird.  I had a problem like this with another Italian style dish I made that was a disaster: Lemon Garlic Chicken Thighs. I was afraid that I had screwed something up and that I was going to have half cooked chicken and nothing else to show my grumbly tummy husband. 


I decided to stick to the recipe (as much as I usually did) and just hope for the best.  The sauce was a nice consistency and it was well mixted, so I added the browned chicken back to the pan.  I let it sit in the sauce for a few minutes to finish cooking and pick up some of the flavors.


The chicken finished cooking in the little hot tub mixture of beef broth and wine, etc... I let it cook for about 8-10 minutes.  Meanwhile, I started making some orzo pasta and green beans to go with lunch.

Luckily, the dish turned out to be really yummy!   I ended up liking it a lot, as a matter of fact.  I don't think I put in as much rosemary as I should have, I used technically 3 sprigs when it called for 6, but the sprigs were HUGE!  Next time I'll add in more and cut it up more finely.


I served the chicken and the sauce over the orzo pasta and with a side of green beans.  The chicken was cooked perfectly.  I think that letting them sit in the liquid to finish cooking really helped it to remain moist.  The chicken was so tender and had a lot of flavor!


So, score 2 out of 2 for Rachel Ray!  This dish will definitely need to be added to my normal routine of cooking! I was nervous there for a minute when it didn't taste too good, but I'm really glad that I stuck through and finished the dish, because it was GREAT!   There weren't many leftovers!