Saturday, August 28, 2010

Holy Cupcake!

HOLY CUPCAKE!


Cupcakes are all the rage now.  Everywhere you look, there are cupcake shops, cupcake wars on TV, and even Cinnabon cupcakes, yes, Cinnabon cupcakes!  Who could even wonder why cupcakes are so popular?  Perfectly portioned bites of sweetness!  Not only that, they come in a HUGE variety of flavors and looks.  You can find your traditional chocolate cupcake with chocolate frosting, or you can find a really funky flavor, like maple syrup and bacon (which I am planning on trying at some point!)

Last week, I decided to try my hand at making some of these yummy little treats.  Aside from being a teacher, I also work at a restaurant called Dogfish Head Alehouse.  One of the hostesses had to work on her birthday, so we decided to make her some cupcakes!  I wanted to make sure there was enough for everyone, and I like variety, so I made a few different flavors.

Normally, I like baking sweets from scratch, but this time, I decided to cheat.  I didn't have too much time to bake all of the cupcakes because I wanted them to be fresh, so I opted for a twist on the simple.


Safeway was having a sale on pre-packaged cake mixes and frostings - PERFECT!  In my own typical way, I just prepared the different cake mixes and added my own twist.  It was difficult to decide which flavors I wanted to try, so I definitely had to narrow it down a bit.  I had thought about a pina colada cupcake, a smore cupcake, a banana nut maple cupcake, and a rocky road cupcake, just to name a few.  I decided on a banana pineapple cupcake with coconut frosting, a chocolate cupcake with peanut butter chips and peanut butter frosting, and an espresso cupcake with hazelnut frosting. 


Again, I don't have any recipes, I just eyeballed everything.  For the Banana Pineapple cupcakes, I used the yellow cake mix.  To give it that real banana flavor (I loathe almost anything that's made with artificial banana, except for those Banana Runt Candies!) I added 2 mushed up, super ripe bananas.  I also added some pineapple juice, instead of using all of the water the recipe called for.  I think I used about half pineapple juice and half water.  This gave them just a hint of pineapple flavor.


I also decided to use those mini-cupcake pans.  I love variety and wanted everyone to be able to taste a few different flavors, rather than just 1.  Here's one of the cupcake tins, ready to go with the Banana Pineapple cupcakes.  You can also see my peanut butter chip cupcakes cooling on the racks.


For the Espresso Hazelnut cupcakes, I used Devil's Food chocolate cake mix, but added in some instant espresso powder.  I thought I added a lot to the mix, but when they were baked, they didn't have that rich coffee flavor that I wanted.  So I added a bit of flair! I made a cream filling with mascarpone cheese, some sugar, and some Kahlua :) I mixed it all together in the stand mixer, filled a pastry bag, and just piped it in!  It worked pretty well, but some of the cupcakes came pretty close to exploding with all of the yummy stuff inside.


The first picture is what they looked like after the hazelnut chocolate frosting and the second picture is what they looked like when they were stuffed, but sans frosting.  I just used a plain white frosting and added yummy gobs of nutella.  I love the combination of hazelnt and coffee... there's just something warm and comforting about it.  So here they are!  I had messed up a couple of them, so I just covered them in sprinkles so you couldn't see the mess ups!


Here's my setup for the Banana Pineapple Cupcakes.  I used white frosting and added coconut milk to it.  I couldn't add too much without making the frosting too runny, so to give it extra coconut taste, I dipped them in sweetened, flaked coconut too.  This was a delicious trick I had used before!  It makes the cupcakes look pretty and it's easy!


Here I am, dipping the cupcakes in frosting and then covering them in coconut!  They were so delicious and reminded me of little snowy hills.


For the Peanut Butter Chocolate cupcakes, I used chocolate cake mix and just added in some peanut butter chips... pretty simple, huh?  To make the frosting, I added peanut butter to the pre-made white frosting.  They tasted absolutely fantastic!  The combination really worked well together.  Also, the peanut butter was really rich, so making them in the small size worked well.  If something is too rich, I always have to take small bites.


(Hazelnut Latte Cupcakes!)

Overall, the cupcakes turned out really well.  They didn't look like Georgetown Cupcake, but they tasted delicious and they were cute!  Everyone from work seemed to like them, and they disappeared pretty quickly.
( Banana Pineapple Cupcakes with Coconut Frosting)

I only prepared 3 boxes worth of cupcakes, but look how many it made!  That's after I had tasted number of "samples" too :)


Cupcakes, cupcakes everywhere!  These attempts have inspired me to create more cupcakes at some point! Keep on the lookout for some smores cupcakes!


Here's the trifecta! 


 I managed to snap one more shot before completely devouring them!

Sunday, August 15, 2010

Stracoto With Porcini Mushrooms


In an effort to be a "smart shopper," whenever I see a good deal, I try to buy extra and freeze it.  Thus, when cleaning out my freezer the other day, I found a huge chunk of beef.  I usually throw it into a slow cooker with some veggies and turn it into pot roast.  I wanted to try a little something different this time though.  I searched the recipes on FoodNetwork.com.  I found this recipe from Giada De Laurentiis and decided to give it a try!


Stracoto with Porcini Mushrooms 


 *1 (4-pound) boneless beef chuck roast
*Salt and freshly ground black pepper
*3 tablespoons olive oil
*2 onions, sliced
*6 garlic cloves, coarsely chopped
*1 cup dry red wine
*1 3/4 cups canned beef broth
*1/2-ounce dried porcini mushrooms

The recipe was pretty simple.  I had most of the ingredients... I had to run out and pick up the porcini mushrooms, but Curt and I almost always have a bottle of wine at the house somewhere. :)  I had intended to make this for dinner one night, but I didn't read the recipe thoroughly because it takes 3 hours to bake!


The first thing you do is season the beef with salt and pepper and then brown it on all sides in a bit of olive oil.
(Kylie wanted to help too)


While the meat was browning, I set to slicing the onions and garlic.  I used 1 GIANT onion instead of 2 regular ones.  Once the meat was browned on all sides, I took it out of the pan to rest for a bit. I then threw in the onions and garlic.  I also added a bit more oil, just to keep everything from burning. 


After the onions and garlic were softened and smelling delicious, I added in the wine and let it come to a boil.  While I was waiting for the concoction to boil, I decided to figure out what to do with the porcini mushrooms.  I've never used them in cooking before, so I wasn't sure how they would taste.
I didn't soak them or anything, just left them dried and threw them in with the beef broth.


I waited a few minutes for the mushrooms to soften up and get used to being in the little beef broth bath. 


After a few minutes, I returned the big hunk of meat to the pan.  You are supposed to use a big roasting pan to cook all of this, but I don't have one.  I decided to just cook everything in a pan and when I came time to "cover and bake," I just transferred everything to a casserole dish and covered it tightly with aluminum foil.

I braised the beef in the oven at 350 for 3, yes, 3 hours.  By this time, the house was smelling absolutely fabulous.  I took the dish out of the oven and carefully removed the beef from the dish and set it on a separate plate for a bit. Look at how delicious it looks!!!


Now, it's time to make the dish even more Curtman friendly.  I took all of the pan juices, onions, mushrooms, and garlic, and poured them into a little container.  Then, I grabbed one of my favorite tools: the immersion blender!  I whirled everything together until there was not one little piece that resembled a veggie.  Instead, it looked and smelled like a delcious gravy!


I served the stracoto with some roasted garlic mashed potatoes.  The dish was absolutely delicious! I'm definitely going to have to make this one again sometime.  Next time, I'll try adding some green beans, or some non-starchy form of veggie to go with it.  Altogether though, I'm definitely going to add this recipe to my Favorite Recipe Box.


Beef Chuck Steak on Foodista

Tuesday, July 27, 2010

Cream Cheese Cookies!

Here in Virginia, we've been having crazy heat!   The entire house has been so hot, I haven't had much motivation to heat up the house even more by turning on the oven.  Curt and I are going to Boston and Maine to visit some friends, so I decided to bake some cookies to bring them.  Since we were going out of town, I didn't have much in the fridge.  I had a block of cream cheese and some butter, but no eggs, so I set out to find a recipe without eggs. 

After perusing my favorite website Allrecipes.com, I found a good recipe for Cream Cheese Snowball Cookies.  Here we go!

CREAM CHEESE COOKIES

* 1 cup confectioners' sugar
* 1/2 cup finely-chopped walnuts (optional)
* 1/2 cup vegetable shortening (such as Crisco®)
* 1/2 cup butter, softened
* 1/2 cup cream cheese, softened
* 1/2 cup white sugar
*1/2 teaspoon almond extract
* 1/2 teaspoon vanilla extract
*1 1/2 cups all-purpose flour


So, first things first.  I decided to double the recipe since I needed to make a bunch of cookies.  Plus, if I had just made 1 batch, I would have half a brick of cream cheese left and half a stick of shortening and would just be a big mess and that just wouldn't do!  


I threw the cream cheese, butter, and shortening in the stand mixer and let it whirl while I got the rest of the ingredients together. 

I added in the flour, sugar, vanilla, and almond extract.  The dough seemed too runny, so I wanted to thicken it up a bit.  Rather than just add more flour, I decided to get creative.

The original recipe called for the finished cookies to be rolled in powdered sugar and walnuts.  I thought that was a good idea, but it seemed too Christmasy... since it's July, I made a little change.


  I swapped almonds for the walnuts and toasted then in a dry pan.  When you toast any nut, the heat activates the oils, which gives the nuts a great flavor. 


Once the almonds were all nice and brown, I ground them up in my little mini food processor.  It just took a few minutes to turn the tan slivers into fine little almond crumbs.  YUM!


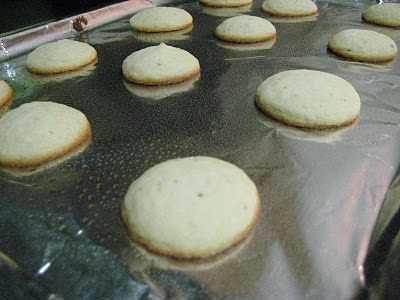
I added in the ground almonds to thicken up the dough a bit.  Luckily, it seemed to do the trick.  I then covered a cookie sheet with some aluminum foil and sprayed it with cooking spray. 


 Next, I rolled the dough into little cookie balls.  I wanted to make the cookies pretty small and bite sized, so the dough balls were pretty small.  I just rolled it between my hands and plopped them down on the cookie sheet about an  1 1/2 inch apart.


I stuck the cookies in the oven for about 8 minutes per batch.  The cookies looked adorable.  They had spread out a bit, and were slightly browned at the edges which is just the way I like them. 


The original recipe said that you should roll the cookies in a mixture of the ground walnuts and the powdered sugar.  I didn't really think it through when I started the cookies, so I tried making a chocolate mixture to roll the cookies in. 


They turned out to be pretty tasty, but they didn't look all that cute.  I decided to try them plain.


They were ok plain too.  I had a TON of cookies, so I took a few and brought them into the restaurant where I work.  They only lasted a few minutes before they were gobbled up.  I did decide to jazz the rest of them up with some frosting and sprinkles!


So these final little cookie bites were delicious!  The cookies themselves weren't all that sweet, so the icing added a nice bit of sugar and fun.  I think that I will definitely have to make these again!  Our friends loved them too!

Saturday, July 17, 2010

Lemon Garlic Chicken Thighs

What Went Wrong ?
Usually, I post recipes that I think went really well!  I post recipes that look pretty and taste yummy!  This recipe looked delicious and I really have no idea how it went so wrong!  Here's the story... you tell me what you think happened!
I have always seen recipes for delicious braised chicken thighs.  Everyone says they are delicious!  I've grilled them before, but never really used them in a braised dish.  I love the flavors and how tender chicken thighs are... the bones don't bother me like they bother some people (ahem Jules).  I bought a huge pack of chicken thighs from the store and figured I would find a great recipe.  I visited one of my favorite websites The Food Network and searched braised chicken thighs.  Up popped Emeril's recipe for

The picture looks delicious, doesn't it?!  I love garlic and I love chicken, so I thought, "what the heck... I'll give it a go!"  Now, mind you, I'm not knocking Emeril's recipe.  I'm sure it's an absolutely fabulous recipe that many people love.  It received 4 out of 5 stars on Food Network's ratings.  I'm sure that it was all me that messed it up!

Here's Emeril's recipe

LEMON-GARLIC CHICKEN THIGHS

* 8 chicken thighs with bones and skin, about 3 1/2 pounds
* 1 3/4 teaspoons salt
* 1 teaspoon freshly ground black pepper
* 1/2 cup all-purpose flour
* 1/4 cup olive oil
* 3 cups thinly sliced onions
* 30 cloves (about 2 heads) garlic, peeled and smashed
* 1/2 teaspoon crushed red pepper
* 1 bay leaf
* 1/2 cup freshly squeezed lemon juice
* 1 1/2 cups chicken broth
* 1 pound angel hair pasta
* 3 tablespoons chopped fresh parsley leaves, plus more for garnish
* 3 tablespoons unsalted butter


 Because this was a recipe that I was trying to actually follow, rather than tweak too much, I did what Emeril told me to do (for the most part).  I pulled the chicken out of the package and seasoned it with a bit of salt and pepper.  Next, I set up a small bowl with some flour, then, one by one, dipped the chicken in the flour to give it a nice, light coating.  Next, I heated up a bit of oil in the bottom of a frying pan. Using only a few thighs at a time, I gently placed them in the pan to brown.  The crackling and popping of the chicken in the oil was great!  It looked beautiful, all crispy and brown.

(the popping and crackling of the chicken was music to my ears!)

  At this point, I seriously considered just cooking the chicken all the way and making fried chicken... but, I didn't.  I flipped them after a few minutes to let them brown on the other side, then placed them on a paper towel lined plate to dry off a bit.  Since I had a ton of chicken, this whole process took a while to go through. By the time I was done, I had beautifully browned chicken (on the outside at least, the insides were still raw). 


(so delicious!)
Once all of the chicken was beautifully browned, I started to work on the lemon-garlic sauce.  I added the sliced onions to the pan and started sauteeing. 


(sooo much garlic! Vampires beware)

 Meanwhile, I set to work chopping 30 cloves of garlic... talk about scaring away vampires! 30 cloves is a ton of garlic to chop! I am now seriously considering buying one of those new fangled contraptions that peels your garlic for you (any tips on what brand works, if at all?).  Anyway, I threw the garlic into the pan to start sauteeing too.


Next, I added in all of the spices- the red pepper flakes, salt, and bay leaf.  Make sure to scrape up all of the browned bits from the bottom of the pan because that's where all of the yummy flavors are trapped!  Now, I said that I wasn't going to change the recipe too much, but I did have a bunch of green beans. I decide to add those to the pan too.  I'm not sure if this was my downfall, but I didn't think it would have been a bit deal to add.  After that, I added in the lemon juice and the chicken broth. 


I don't have an actual braising pan.  You're supposed to make the whole thing in a braising pot, then add the chicken thighs, bring the liquids to a simmer, then cover it and bake it in the oven.  Since I had to improvise, I brought all of the liquids to a simmer, then transferred it to a baking dish.  Then, I added in the chicken thighs, covered it tightly with aluminum foil, and stuck it in the oven at 350. 

(looks good, doesn't it?)

I did also slice up some lemons into little wheels and threw those in there too. I thought they looked really pretty.  Maybe the rind of the lemon was the problem...

Anyway, after 20 minutes, I took the aluminum foil off the chicken and let the dish cook for an additional 15 minutes.  I also boiled some angel hair pasta to serve with the chicken.  I thought this would be yummy. 

(looked better than it tasted)

The whole dish looked absolutely delicious.  The chicken was tender and it looked great.  Unfortunately, the taste was awful.  It tasted like a bad mix of some type of bitterness and sourness.  I'm really not sure what happened or why.  It could be because I added in green beans, or maybe because I added the lemon rind, or maybe because I didn't have a real braising dish.  I have no idea.  I tried to pass it off to Curt like there wasn't anything wrong with it, but even he agreed that the taste was off somehow.  I didn't want to throw it all out, but I didn't like the taste.  I ended up throwing away everything, but the chicken.  I just somehow wiped everything off the chicken and was able to get rid of most of the bitter/sour.  I ended up just putting the chicken on the pasta, adding a bit of garlic salt and butter, then putting it all together.  It wasn't half bad... not idea, but it was better than wasting everything!